With Windows Server 2016 just around the corner, one of the the new features is support for Windows Failover Cluster inside a Workgroup. In this blog post today, we will show you how to setup Windows Server 2016 Technical Preview with SQL Server 2014 AlwaysOn Availability Groups without a domain controller.
Before we begin, there are some gotchas listed below which we noticed during testing:
- There will be a lot of event log errors in regards to DNS registration. This is because we are not using a domain environment and we are not making use of Azure’s DNS servers.
- File Disk quorum is not supported in a Workgroup Failover Cluster, so we will be using a Cloud Witness through Microsoft Azure storage services.
- Since we are not using DNS service with this cluster, we will edit the hosts file on each cluster node with the correct hostname information.
- As this was a test, we disabled the Windows Firewall on each node and the Network Security Groups in Microsoft Azure for the cluster nodes.
- The SQL listener is configured differently in Azure but we will still show you how it’s configured in a regular environment as well.
- There are many places you can add a DNS suffix in Windows Server, I didn’t place it inside TCP/IP settings because Azure doesn’t play nice when you modify those settings within the OS.
- We built this test environment inside Microsoft Azure which will require us to use a load balancer on top of the SQL listener. If you are not using Microsoft Azure, you can skip the load balancer step at the end.
Environment Setup in Microsoft Azure
- Virtual Network – 10.0.0.0/24
- Two Clustered NodesServers running Windows Server 2016 Technical Preview and SQL Server 2014
- VM1 – uswsqlha0.celedonpartners.com (10.0.0.10)
- VM2 – uswsqlha1.celedonpartners.com (10.0.0.11)
- Windows Failover Cluster Instance
- uswsqlhacluster0.celedonpartners.com (10.0.0.15)
- Hosts entries in each cluster nodeserver (C:WindowsSystem32Driversetchost)
12310.0.0.10 uswsqlha0.celedonpartners.com #primary sql server10.0.0.11 uswsqlha1.celedonpartners.com #secondary sql server10.0.0.15 uswsqlcluster0.celedonpartners.com #windows failover cluster
Preparing each node and creating the cluster
- Create a new user on each cluster node and add it to the local administrators group. Make sure each node uses the same account name and password
- Since we are not using the built in local administrator account, we will also need to run the following powershell command on each server node:
1New–ItemProperty –path HKLM:SOFTWAREMicrosoftWindowsCurrentVersionPoliciesSystem –Name LocalAccountTokenFilterPolicy –Value 1
- Add a DNS suffix as Failover Cluster Services require it. I will be using celedonpartners.com but using anything works as long as you also update your host files.
- To create the cluster, run the following powershell command on the first node (uswsqlha0.celedonpartners.com)
1New–Cluster –Name uswsqlcluster0 –Node uswsqlha0, uswsqlha1 –StaticAddress 10.0.0.15 –AdministrativeAccessPoint DNS
StaticAddress being the IP address of the cluster. You can safely ignore the DNS registration warnings
Connecting to the cluster and configuring the cloud witness quorum
- Launch the Failover Cluster Manager mmc from Administrative Tools
- Click Connect to Cluster in the actions pane to the right. In the connection window, you can go ahead and click ok
- In the action panel to the right, click More Actions > Configure Cluster Quorum Settings > Next > Select the quorum witness > Configure a cloud witness
- Launch a web browser and navigate to https://portal.azure.com and login to your Azure subsription
- Click New > Data + Storage > Storage Account and fill in the necessary fields to create a storage account then click Create. I named my storage uswsqlhacloudwitness
- Once the storage account is created, click Storage accounts > Storage Account Name (uswsqlhacloudwitness) > Access keys
Installing SQL Server 2014 (Repeat steps on both nodes)
Run setup.exe from the SQL 2014 ISO and complete the default install with the specific settings below.
- SQL Features – Database Engine Service, SQL Server Replication, SQL Server Management Studios (Complete)
- SQL Service Accounts – Use the local admin account we created for the SQL Server Database Engine service. It is important you use these accounts we created otherwise you will get an error when you try to create the availability group.
- Database Engine Configuration – Set Mixed Mode > Add Current User and enter a SA password
Preparing SQL Server 2014 for AlwaysOn High Availability
(Repeat steps on both nodes)
- Launch the SQL Server 2014 Configuration Manager mmc from the program menu
- Right click on SQL Server (MSSQLSERVER) > Properties
- Click on the AlwaysOn High Availabilty tab at the top > Enable AlwaysOn Availability Groups checkbox > OK
Create a database and back it up
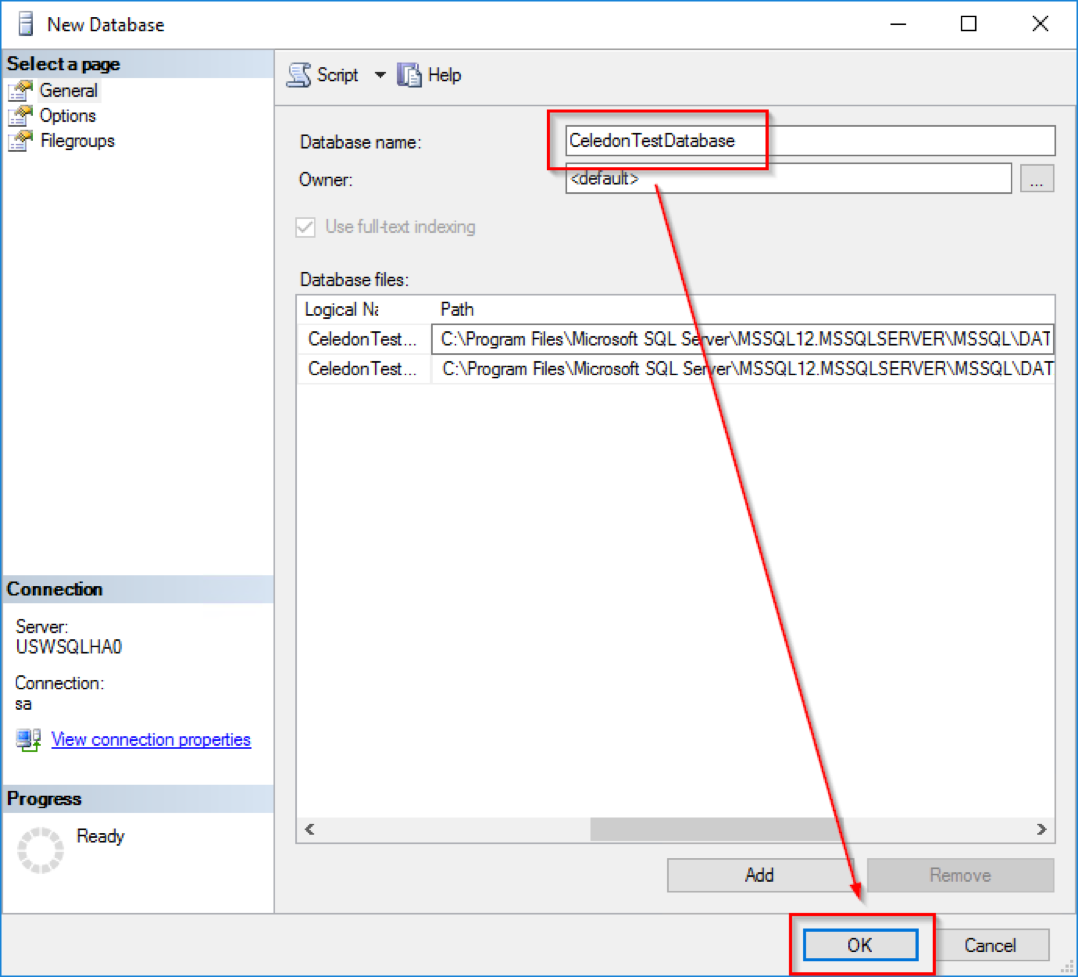
- Right click on Databases > New Database
- Enter a Database Name > OK (I used CeledonTestDatabase)
- Right click the database we just created > Tasks > Backup Database > Use the default settings to create the backup (A full backup is a SQL requirement prior to adding the database to the availability group)
Creating the SQL 2014 AlwaysOn Availability Group
- Login to the first node (uswsqlha0) and create the following windows for the initial database sync
- C:dbsyncshare (The share should be \uswsqlha0dbsyncshare)
- Everyone: read/write permission (You can remove the permission after the databases are syncronized)
- Return to SQL Server Management Studio
- Right click AlwaysOn High Availabilty Group > New Availabilty Group Wizard > Next
- Enter your Availability group name > Next (I used CELEDON_PARTNERS_HA)
- Click Add replica
- In the login window, set the server name of your second cluster node > enter in SA credentials > Connect
- The replica should now be added > check off Automatic Failover and Synchronous Commit > Next
(You will receive an endpoint error, just click yes as we are using non-domain accounts)
- You will be prompted to specify a share for the initial database synchronization. Use the share we created in the earlier step and click next
- The wizard will run a validation check, we will create the listener afterwards so ignore the warning. Click Next > Finish to create the availability group
Adding a SQL Listener
- Set a Listener name, port, and static IP address then click ok (I used SQL_LISTENER with the default 1433 port and 10.0.0.20 as the IP address)
- At this point the SQL AlwaysOn Availability group should now be completely setup if your environment was not built in Microsoft Azure.
- You can go ahead and try testing the the availability group by connecting to 10.0.0.20
- If you are using a Microsoft Azure environment, proceed to the next step as you will need to also setup an Azure Load Balancer to get the availability group to work correctly.
Creating an Internal Load Balancer in Microsoft Azure
Microsoft documented the setup process for domain-based cluster in Azure here: https://azure.microsoft.com/en-us/documentation/articles/virtual-machines-windows-portal-sql-alwayson-int-listener/ and here: https://azure.microsoft.com/en-us/documentation/articles/virtual-machines-windows-portal-sql-alwayson-availability-groups-manual/ but since we are using a workgroup cluster, the steps below are slightly different.
- Login to Azure Resource manager here: https://portal.azure.com
- Click New > Networking > Load Balancer > Enter the load balancer name, Select the virtual networksubnet, and the private IP address of the load balancer > Create
- Go into the properties of the load balancer > Backend pools > Add > Set a backend pool name > Add the cluster nodes > OK
- We now will setup the load balancing probe. Select Probes > Add > Enter a name > TCP > Enter a port, I used 59999 (do not use 1433) > I changed Unhealthy threshold to 5 > OK
- Next we will setup the rules. Click Load Balancing Rules > Add > Enter a rule name > TCP > Enter 1433 for both ports > Select the Probe we created in the earlier step > OK
Connecting Windows Failover Cluster to work with Microsoft Azure Internal Load Balancer
We will use the following script which was on the Microsoft Azure documentation site to bind the network load balancer and SQL listener
|
1 2 3 4 5 |
$ClusterNetworkName = # use Get-ClusterNetwork $IPResourceName = # use Get-ClusterResource and use the name of the sql-listener IP address $ILBIP = “10.0.0.25” # this is the private IP address of the Azure internal load balancer Import–Module FailoverClusters Get–ClusterResource $IPResourceName | Set–ClusterParameter –Multiple @{“Address”=“$ILBIP”;“ProbePort”=“59999”;“SubnetMask”=“255.255.255.255”;“Network”=“$ClusterNetworkName”;“EnableDhcp”=0} |
Launch powershell and run the following commands and make note of the Cluster Network Name and SQL Listener IP address:
|
1 2 |
Get–ClusterNetwork Get–ClusterResource |

Modify the powershell script with the relevant information and execute the script. In my case, the script looked like this:
|
1 2 3 4 5 |
$ClusterNetworkName = “Cluster Network 1” # the cluster network name (Use Get-ClusterNetwork on Windows Server 2012 of higher to find the name) $IPResourceName = “CELEDON_PARTNERS_HA_10.0.0.20” # run Get-ClusterResource and use the name of the sql-listener IP address $ILBIP = “10.0.0.25” # the IP Address of the Internal Load Balancer (ILB). This is the static IP address for the load balancer you configured in the Azure portal. Import–Module FailoverClusters Get–ClusterResource $IPResourceName | Set–ClusterParameter –Multiple @{“Address”=“$ILBIP”;“ProbePort”=“59999”;“SubnetMask”=“255.255.255.255”;“Network”=“$ClusterNetworkName”;“EnableDhcp”=0} |
Go ahead and restart the cluster services for the change to update. At this point the internet load balancer is now configured to work with the cluster. You should be connecting to SQL through the ILB (10.0.0.25) not the SQL listener (10.0.0.20)