Anyone that has worked with USD knows that its Achilles heel is the lack of documentation that comes with it. Microsoft MVP Neil Parkhurst (https://neilparkhurst.com/2016/06/20/usd-the-book/) does a solid job at filling in the gaps that Microsoft missed from a CRM configuration side, but he doesn’t go to in-depth when it comes to the coding part. The goal for this post (and the series which follows) focuses on creating USD application with emphasis on what you can do within Custom Hosted Controls. These controls are WPF-based pages that can be displayed virtually anywhere inside USD. I hope that this tutorial can provide a good end-to-end experience for someone just starting out with Unified Service Desk.
The tutorial assumes that you have at least a very basic understanding of what USD is and the concepts behind it.
Step 1 – Download Unified Service Desk Visual Studio SDK
This Visual Studio plugin is required to provide the necessary Unified Service Desk datatypes and classes for your custom hosted controls.
Download it and install it from here
Step 2 – Create a new Solution and Project
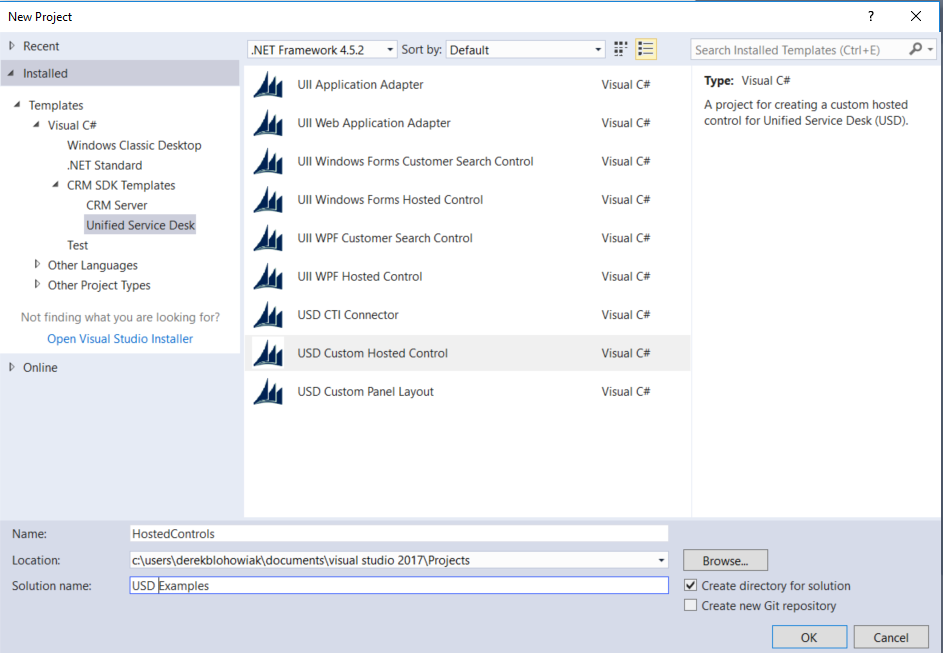
Next we’ll be creating the Solution and USD class library (the source of our USD custom hosted controls). In Visual Studio, create a new project from the File menu. Under “Installed”, navigate to Templates CRM SDK Templates → Unified Service Desk and create a “USD Custom Hosted Control” project.
Make sure to name it HostedControls as I do here. These names will be important when we must reference them from within USD configuration alter (see below image).
Sorry for not using Dark Theme
When done, your Solution Explorer should look like this:
![]()
Step 3 – Create a USD Custom Hosted Control Class
Now we’ll create the actual class that represents the Custom Hosted Control. I create this inside of a “Hosted Controls” folder because in a larger project with lots of hosted controls, it can get really messy with them floating all over the place.
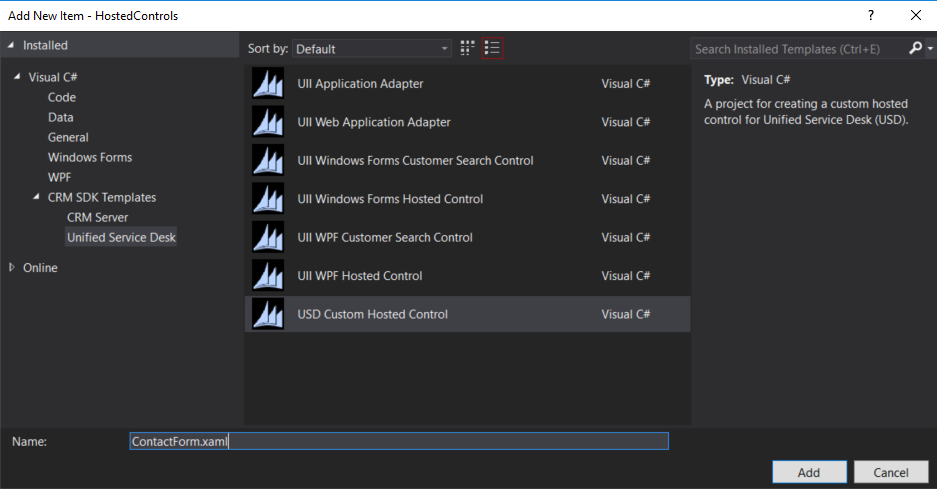
In your “Hosted Controls” folder, add a new item of the template “USD Custom Hosted Control” which can be found in your templates Visual C# → CRM SDK Templates → Unified Service Desk.
Make sure that you name this “ContactForm” as we will also use this name to reference it later.
Step 4 – Create a Basic WPF Button Control and Click Event
In your ContactForm.xaml file, copy the following line of code into line 16 (Just above the </grid> closing tag):
|
1 |
<Button Name=“LoadButton” Content=“Say Hello” HorizontalAlignment=“Left” Margin=“20,20,0,0” Grid.Row=“1” VerticalAlignment=“Top” Width=“75” Click=“LoadButton_Click”/> |
Next, double click on the button so that it automatically adds a “Click” event into the code-behind file. Add the following code listed below.
|
1 2 3 4 |
private void LoadButton_Click(object sender, RoutedEventArgs e) { MessageBox.Show(“Hello world!”, “First Button Test”); } |
Step 5: Build and Deploy your Code
Build the project. Copy the built DLL “HostedControls.dll” from your project’s output directory and paste it into USD’s base directory. For 64-bit USD installs, that default USD directory location is this:

That’s it! Deploying code is as simply as copying a DLL over to your USD directory.
Step 6 – Create USD Custom Hosted Control CRM Configuration
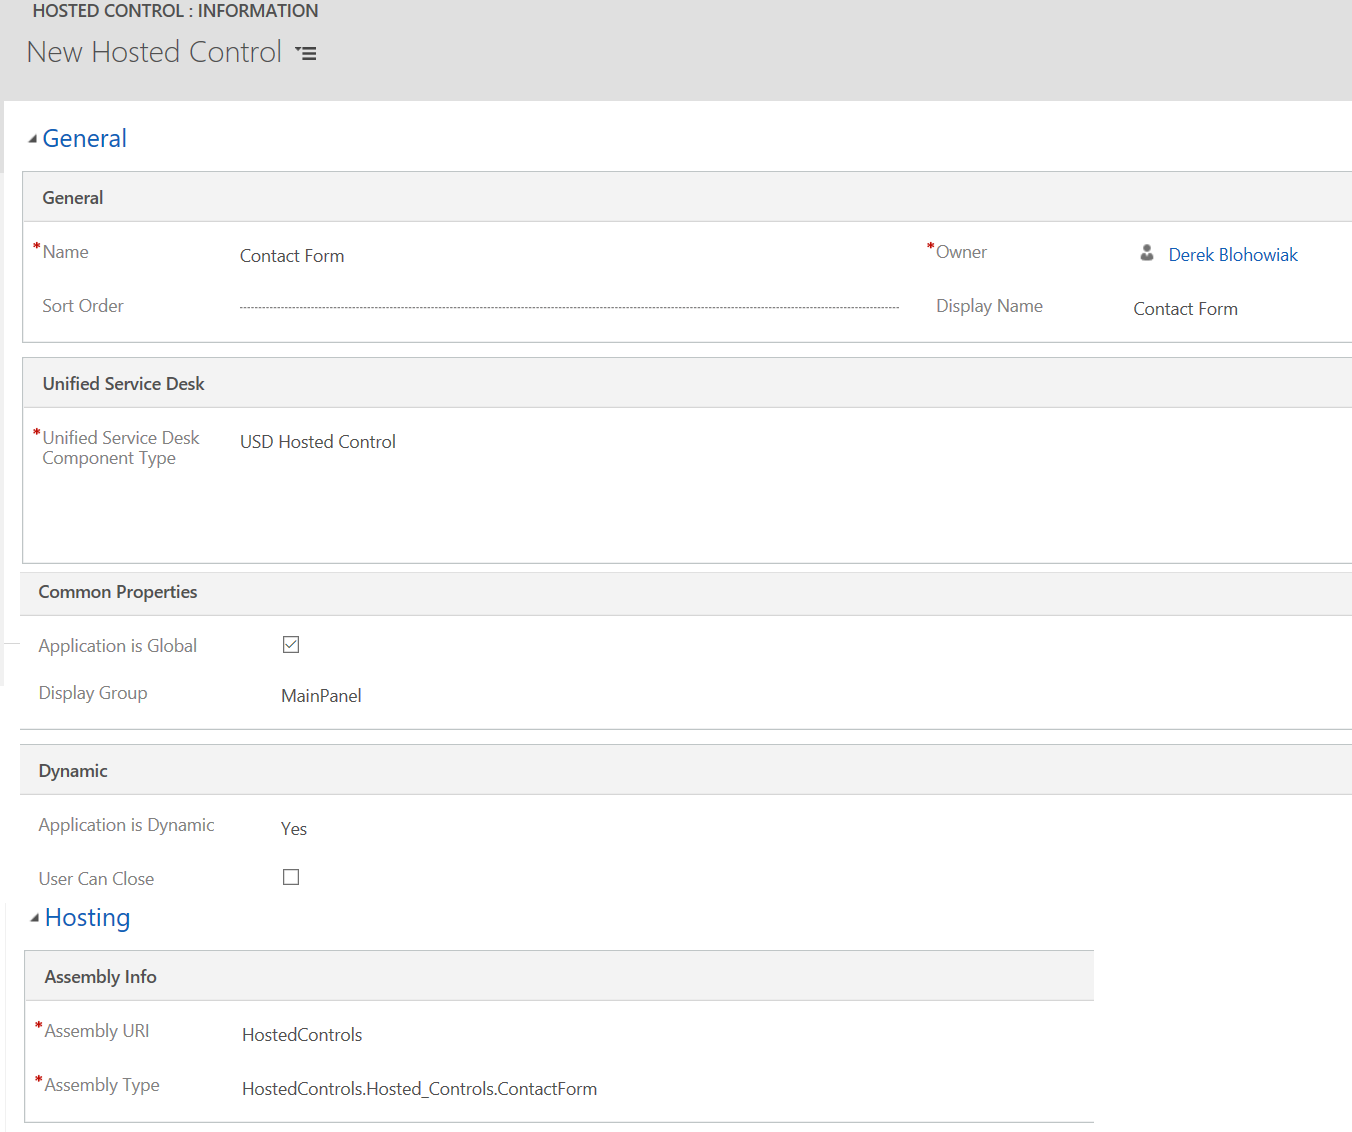
We must create a new hosted control and tell USD to look for the code that we just wrote. Navigate to the Unified Service Desk area in your CRM instance. Click on “Hosted Controls”, and define a new USD custom hosted control as defined below:
| Field | Value | Description |
|---|---|---|
| Name | Contact Form | This can be anything, but it should be descriptive so you can find it later. |
| Display Name | Contact Form | This is text that will appear in the tab of which your control is displayed. |
| Unified Service Desk Component Type | USD Hosted Control | This lets USD know that this is a custom-defined page. |
| Application is Global | Checked | Making an application “Global” will let it stand on its own. It will not have to reside in any kind of USD session. |
| Display Group | MainPanel | Display this control in the main area of USD |
| Assembly URI | HostedControls | This is the name of assembly. In our case, it is HostedControls.dll, so we use “HostedControls” here. |
| Assembly Type | HostedControls.Hosted_Controls .ContactForm |
This is the namespace of your USD hosted control. Located in the first line of the ContactForm.xaml file |
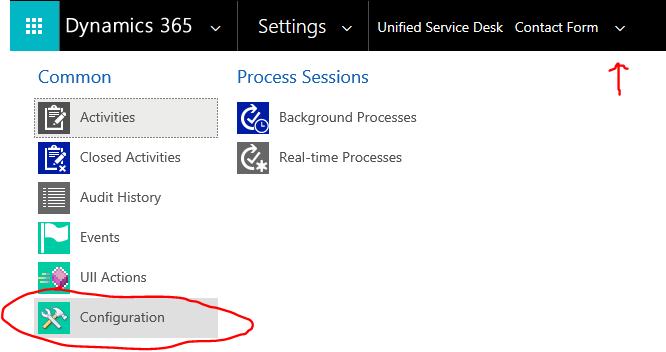
You will also need to add this USD custom hosted control to your configuration file. This is my preferred way to do this after I create something new in USD:
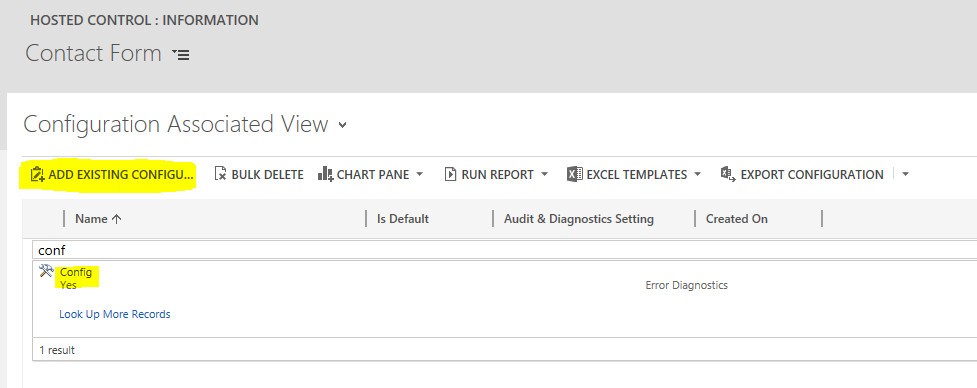
Step 7 – Create Button and Action to Load Control
If you haven’t already, make sure you setup a toolbar as outlined here: https://neilparkhurst.com/2015/11/01/usd-create-a-home-button-in-the-toolbar/
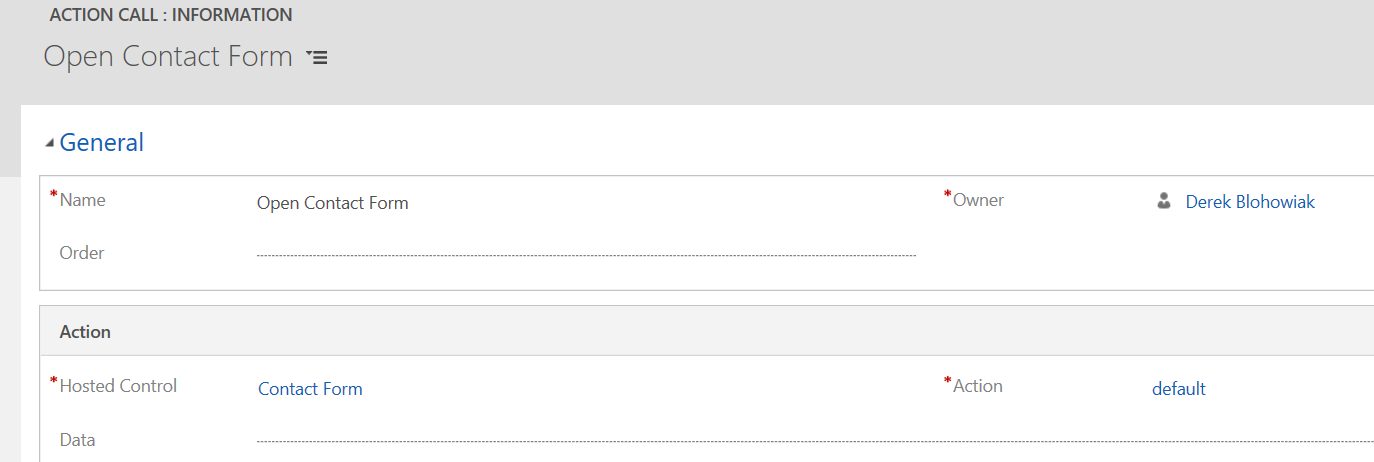
First, we will create the actual action that will open our new USD custom hosted control. This action will execute on our “Contact Form”. It will execute the “default” action. The “default” action is created automatically for all hosted control. It’s most common use is opening controls. This could be because it lacks the ability to trigger any secondary actions.
Hint: Again, make sure you add this new action to your configuration file like we did with the Contact Form above!!
Second, create a toolbar button and action to open our hosted control. There are many ways to open a hosted control, but I prefer opening from a Toolbar button for testing as it won’t load until I tell it to.
Important Note:
Toolbar buttons are a bit weird in that they do not need to be added to the configuration file. This is because they are children of a Toolbar entity which is already in the configuration file. Toolbar buttons cannot exist on their own without belonging to a Toolbar entity.
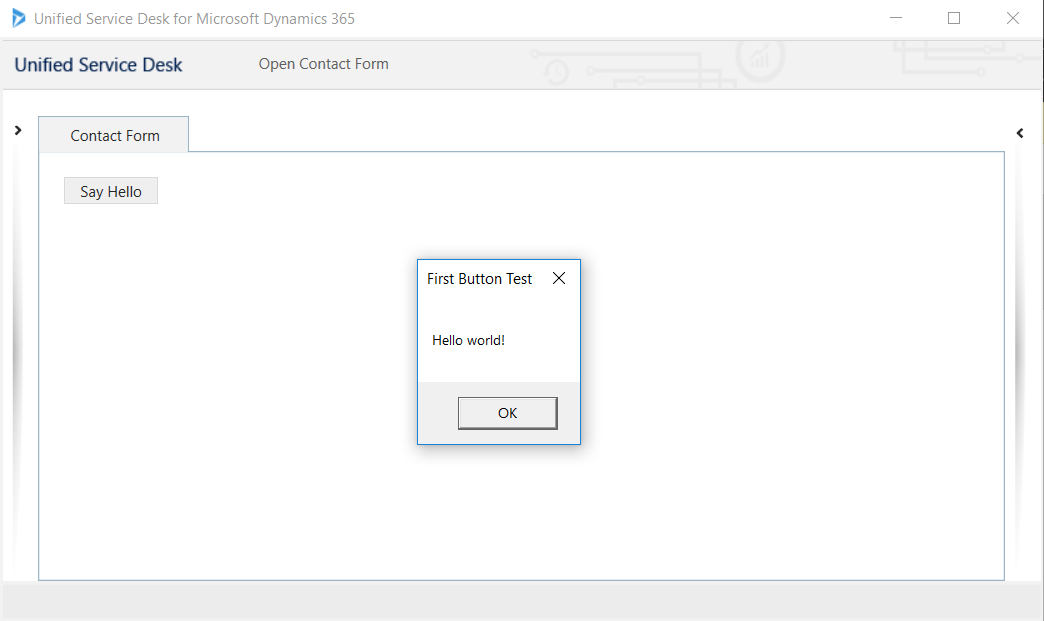
Step 8 – Launch USD and your new Control
Launch USD. Click on your test “Open Contact Form” button. Your USD custom hosted control will load. Click on the “Say Hello” button you within the control to see the message box event. Congratulations, you have just created your first USD Custom Hosted Control!
If you enjoyed this post you might also enjoy our post on deploying USD (find it here) and stay tuned for future USD hosted control goodness!